How Seeds Wake Up: A Beginner’s Guide to Germination
A seed can sit quietly in a packet for years.
It does not look particularly ambitious.
Then you add moisture, warmth, and air. The seed coat softens. A tiny root appears. A shoot follows. A few days later, something that looked like a dry speck is standing upright and reaching for the light.
Seed germination never really stops being remarkable.
It can, however, become easy to overthink.
New gardeners sometimes imagine successful germination requires special trays, expensive lights, precise instruments, and the ability to maintain greenhouse conditions on a kitchen counter.
It does not.
Seeds need a few basic things, and gardeners need enough patience to let them happen. This beginner’s guide to seed germination will help you provide the right conditions without turning the spare bedroom into a laboratory.
And if a few seeds do not sprout?
That is not a failed garden.
It is one planting.
A packet gives you more than one chance.
What Seed Germination Actually Means
A dry seed is alive, but resting.
Inside is a tiny plant embryo and enough stored food to begin growing. When the seed absorbs water, the seed coat softens and the embryo wakes up.
The first part to emerge is usually the radicle, which becomes the plant’s first root. It grows downward, anchors the seedling, and begins searching for water.
Next comes the shoot.
The first leaves to appear are often cotyledons, also called seed leaves. They may look nothing like the plant’s mature foliage. Their job is to help support the seedling until its first true leaves develop.
This entire beginning happens with energy stored inside the seed.
Seeds do not need fertilizer to germinate.
They need moisture, oxygen, and the right temperature.
Some also have preferences about light or darkness, but most ordinary vegetable and flower seeds are not particularly demanding once those three fundamentals are in place.
The complicated-looking process is already built into the seed.
Our job is mostly to avoid getting in its way.
Three Things Most Seeds Need
Moisture Wakes the Seed
A seed must absorb water before germination can begin.
The soil or seed-starting mix should remain consistently moist during this period. If it dries completely after the seed has started to germinate, the tiny emerging root may die.
Moist does not mean soaked.
Think of a wrung-out sponge: damp throughout but not dripping. That is close to what you want from seed-starting mix.
Air Keeps It Alive
Seeds need oxygen while they germinate.
When soil stays waterlogged, the spaces that normally hold air fill with water. Seeds can rot before they ever reach the surface.
This is why containers need drainage holes and why light seed-starting mix works better indoors than heavy garden soil.
The seed needs water.
It also needs somewhere for the extra water to go.
Temperature Sets the Pace
Every crop has a temperature range where it germinates most readily.
Tomatoes, peppers, eggplants, basil, cucumbers, and squash generally prefer warm conditions. Lettuce, peas, spinach, kale, onions, and many other cool-season crops germinate at lower temperatures.
A pepper seed in cool soil may not be dead.
It may simply be in no hurry.
Matching the temperature to the crop can turn a scattered three-week germination into a much more encouraging tray of seedlings.
Start With Seeds Worth Growing
Fresh seed usually gives you the best odds, but fresh does not always mean purchased this year.
Many seeds remain viable for several seasons when kept cool, dry, and away from direct sunlight. Tomatoes, beans, cucumbers, squash, and many flowers can last for years under good storage conditions.
Onion, parsnip, and parsley seeds tend to lose viability more quickly.
Older seed is not automatically useless. It may simply germinate at a lower rate.
If you are unsure, place ten seeds on a damp paper towel, fold it over, and keep it in a warm spot. Check the seeds during the normal germination period for that crop.
If eight sprout, the seed is in excellent shape.
If four sprout, sow more generously.
If nothing happens, you have learned that before giving the packet an entire row of valuable garden space.
Affordable seed makes it easier to plant a few extras and see what happens. Our Easy Vegetables to Grow are a good place to begin with varieties chosen for reliable germination and forgiving growth.
Fast wins build confidence.
And confidence is one of the best things a first garden can produce.
Read the Packet Before Planting
Seed packets contain a surprising amount of useful information in a very small space.
Look for:
- Planting depth
- Germination temperature
- Expected germination time
- Indoor starting recommendations
- Last frost timing
- Plant spacing
- Days to maturity
You do not need to memorize any of it.
Read the packet, plant the seed, and keep the packet nearby.
Planting depth matters because seeds begin with a limited supply of stored energy. If planted too deeply, a small seed may use all that energy before its shoot reaches the surface.
A useful general rule is to plant a seed about two to three times as deep as it is wide.
Tiny lettuce, snapdragon, and many herb seeds may need only a light covering or direct contact with the soil surface. Beans, peas, corn, squash, and sunflowers can be planted considerably deeper.
When in doubt, follow the packet.
The seed company has already done some of the experimenting for you.
Not Every Seed Belongs Indoors
Starting seeds inside can extend the season, but it is not automatically the best way to grow every plant.
Tomatoes, peppers, eggplants, basil, broccoli, cabbage, and many flowers often benefit from an indoor head start.
Fast-growing vegetables such as beans, peas, squash, cucumbers, corn, carrots, beets, and radishes are often easier to sow directly into the garden. Some grow so quickly that starting them indoors merely creates another job.
Root crops especially prefer to begin where they will grow. Transplanting a carrot seedling is possible, but it is a considerable amount of effort for a carrot that may respond by growing into an interesting shape.
Our guide to direct sowing vegetable seeds explains which crops are usually happiest going straight into the ground.
Starting fewer things indoors can produce a better garden.
You can give the tomatoes and peppers the good spots under the lights while beans, cucumbers, squash, and flowers wait for warm soil outside.
Starting Seeds Indoors Without an Elaborate Setup
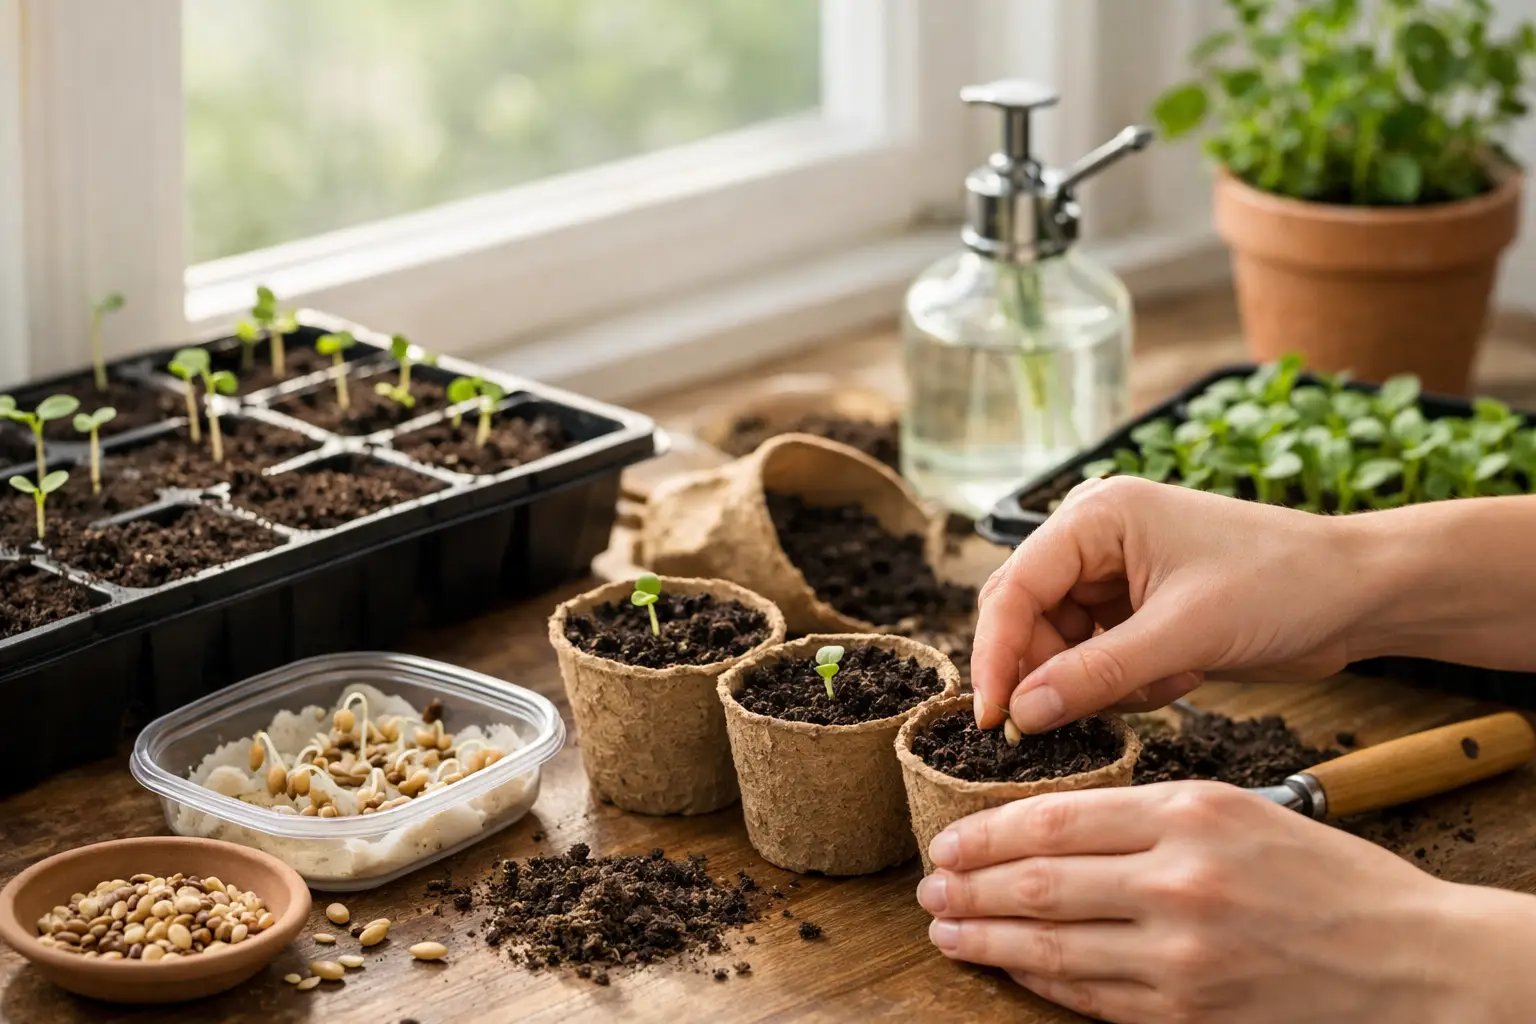
For basic indoor seed starting, you need:
- Clean containers
- Drainage holes
- Seed-starting mix
- Water
- Labels
- Enough warmth for the crop
- Strong light after germination
That is enough.
Seed trays are convenient, but they are not the only option. Reused nursery cells, small pots, and clean yogurt cups with holes added to the bottom can all grow seedlings.
The plant does not know whether its container came from a garden catalog or the recycling bin.
It does notice drainage.
Use a light, fine-textured seed-starting mix rather than soil dug from the yard. Outdoor soil can become compacted in small containers and may hold too much water. It can also bring weed seeds, insects, and disease organisms indoors.
Moisten the mix before filling the containers. Dry seed-starting mix can be surprisingly resistant to water and may float out of the pot when watered from above.
Fill the containers gently. Do not pack the mix down as though you are making bricks.
Plant the seeds at the recommended depth, label the container, and water carefully.
Then wait.
That last step is often the hardest one.
Label Everything
When planting, it feels impossible that you could forget what is in each container.
You planted the tomatoes on the left.
The peppers are behind them.
The basil is in the small tray.
Obviously.
Three weeks later, everything is green, several pots have been moved, and the labels you intended to add tomorrow never appeared.
Young tomato, pepper, eggplant, and flower seedlings can look remarkably similar.
Label every container with the crop, variety, and planting date.
Do it while planting, not afterward.
A label turns “some kind of tomato” into useful information. You can see how long the variety took to germinate, compare it with another, and remember which one earned another place in next year’s garden.
This is how gardening knowledge begins.
Not with remembering everything.
With writing down the things you know you will forget.
Warmth Helps More Than Most Beginners Expect
A seed packet may say a variety germinates in seven to fourteen days.
That usually assumes reasonably good conditions.
A tomato seed sitting in cold mix beside a drafty window may take longer. A pepper may take much longer. The gardener checks every morning, sees nothing, adds more water, and begins wondering whether the seeds are any good.
Often, the seed is simply cold.
Many warm-season crops germinate best when the mix is around 70°F to 80°F. Peppers and eggplants may appreciate it warmer still.
A seedling heat mat can help, but it is not essential. The top of a refrigerator, a consistently warm room, or another protected location may work.
Do not place containers directly on a radiator or somewhere they will overheat.
Cool-season crops need a different approach. Lettuce, spinach, peas, kale, onions, and several flowers germinate readily in cooler conditions. Lettuce may actually germinate poorly when the soil is too hot.
The right temperature is not one temperature.
It is the temperature that suits the seed you planted.
Keep the Mix Moist, Not Miserable
Overwatering is probably the most common germination mistake.
It comes from a good place.
The gardener knows seeds need moisture, checks the tray six times a day, and adds a little more water each time.
Soon the seeds are living at the bottom of a very small swamp.
Saturated mix contains little oxygen. Seeds soften, decay, and disappear before they sprout.
Check the mix daily. If the surface is beginning to lighten in color or feels less damp, add water gently.
A spray bottle can work for very small surface-sown seeds. For larger seeds, a small watering can or gentle stream is fine as long as it does not wash the seeds out of place.
Clear humidity domes or loose plastic covers can slow moisture loss during germination. Remove the cover once seedlings begin emerging. Young plants need airflow, and a permanently humid enclosure can encourage fungal disease.
Water is essential.
More water is not more essential.
Light Becomes Urgent After Germination
Most seeds planted under the soil do not need light to begin germinating.
The moment the shoot appears, that changes.
A newly emerged seedling starts looking for light immediately. If the light is weak or too far away, the stem stretches upward. The result is a tall, thin seedling leaning toward the nearest window.
A bright windowsill may work for a small number of seedlings later in spring, but window light is often weaker than it appears and comes from only one direction.
A basic LED or fluorescent grow light placed a few inches above the seedlings gives more dependable results. Keep it close enough to prevent stretching and raise it as the plants grow.
Most seedlings do well with 14 to 16 hours of light followed by a period of darkness. An outlet timer makes the schedule easy.
A small fan set on low can provide gentle air movement once seedlings are established. The leaves should flutter slightly, not bend hard in one direction.
Light gives the seedling energy.
Movement encourages it to build strength.
Together, they produce the short, sturdy plants gardeners hope to carry outside in spring.
Bottom Watering Makes Life Easier
Once seedlings emerge, bottom watering can be simpler and gentler than pouring water over them.
Set the containers in a shallow tray of water and allow the mix to absorb moisture from below. Remove the containers once the surface becomes evenly moist.
Do not leave them sitting in water all day.
Bottom watering avoids knocking over tiny seedlings, keeps foliage drier, and encourages roots to grow downward.
It also makes watering feel less dramatic.
No tiny soil craters.
No lettuce seeds floating into the neighboring cell.
No mystery plant appearing three inches from where you are certain you planted it.
Gardeners have enough mysteries already.
When Seeds Do Not Germinate
Sometimes you do everything reasonably well and nothing appears.
Before declaring the seeds a failure, check the expected germination time. Radishes may emerge in a few days. Peppers, parsley, and some flowers can take considerably longer.
Cool conditions slow the process.
Give the seeds their expected time and a little extra patience.
Avoid digging them up every morning to see what is happening. A seed can be doing perfectly well until an impatient gardener finds it with a pencil.
If enough time has passed, look for patterns:
- Soft or moldy seeds: The mix may have stayed too wet.
- Hard, unchanged seeds: The mix may have been too cold or too dry.
- Seeds missing entirely: Birds, mice, insects, or heavy rain may be involved outdoors.
- Seedlings trapped below the surface: They may have been planted too deeply.
- Tall, pale sprouts: They need stronger or closer light.
- Seedlings collapsing at the soil line: Excess moisture, poor airflow, or damping off may be the cause.
- Only a few sprouts: The seed may be older, or conditions may have been uneven.
Change one likely problem and plant a second small batch.
That teaches you more than changing the soil, temperature, light, container, water, and seed all at once.
If the second planting grows, you have learned something useful.
If it does not, try again or plant another variety.
A packet contains more than one experiment.
Direct Sowing Is Simple, but the Weather Participates
Direct sowing means planting seeds exactly where they will grow.
Prepare the soil, plant at the proper depth, water gently, and keep the seed zone moist until seedlings appear.
No lights.
No trays.
No potting mix scattered across the kitchen.
It is beautifully simple.
Outdoor conditions, however, are less cooperative than a seed-starting shelf. A heavy rain can wash tiny seeds away. Wind can dry the soil surface. Birds may inspect freshly planted rows. One warm afternoon may be followed by a week of cold soil.
Plant when conditions suit the crop.
Cool-season vegetables such as peas, lettuce, spinach, radishes, carrots, kale, and onions can germinate in cooler soil. Beans, cucumbers, corn, squash, melons, and other warm-season crops are usually better planted after the soil warms.
Firm the soil gently after planting so seeds have good contact with moisture. Mark every row.
A garden label tells you where to water and prevents a surprisingly common gardening mistake: carefully pulling out the crop because it looked suspiciously like a weed.
Plant a Little Now and a Little Later
You do not have to sow an entire packet at once.
In fact, for many crops, it is better not to.
Plant a short row of lettuce or radishes. Wait ten days and plant another. Do the same with cilantro, spinach, bush beans, and other quick crops.
This is called succession sowing.
It spreads the harvest so thirty radishes do not become ready on one Tuesday. It also spreads your risk.
If the first planting is washed out by rain, dries during a windy week, or becomes breakfast for a rabbit, the next planting still has a chance.
Successive sowing turns one packet into several experiments under slightly different conditions.
That is useful because gardens change quickly.
The soil that was cold in early April may be perfect two weeks later. A wet spell gives way to sunshine. Insects arrive and leave. One planting struggles while the next grows as though gardening were the easiest thing in the world.
Sometimes timing is the only difference.
Thin Seedlings Even When It Feels Wrong
A cluster of seedlings in one cell looks like success.
For a while, it is.
Then they begin competing for light, water, nutrients, and space. The strongest stretch above the others while weaker seedlings remain crowded underneath.
Once seedlings develop their first true leaves, thin crowded containers.
Choose the strongest plant and snip the extras at soil level with clean scissors. Pulling them may disturb the roots of the seedling you want to keep.
Yes, cutting healthy seedlings feels wasteful.
Most gardeners hesitate the first time.
But six crowded seedlings do not become six strong plants merely because we could not choose between them.
Giving one plant the room to grow is often the kinder decision.
Give Seedlings a Gentle Move Outdoors
Indoor seedlings are not ready for full outdoor conditions simply because they are large enough.
They have lived without strong sun, wind, cold nights, or sudden temperature changes. Moving them directly from a protected shelf into the garden can scorch leaves and stall growth.
Before transplanting, harden seedlings off over seven to ten days.
Begin with an hour or two outside in a sheltered, shady location. Gradually increase their time outdoors and exposure to morning sun. Bring tender plants inside when nights are cold or frost is possible.
Watch the plants rather than following the schedule blindly.
If they wilt, bleach, or look stressed, slow down.
Our guide to when to transplant seedlings without overthinking it explains how to judge the plant, soil, weather, and forecast together.
The goal is not to move seedlings outside on the earliest possible date.
It is to give them a fair start.
Begin With Something That Wants to Grow
Some seeds require patience, special treatment, or very specific conditions.
They can be rewarding.
They are not always the best place to begin.
A first-time seed starter will usually build more confidence with radishes, lettuce, beans, peas, basil, tomatoes, zinnias, cosmos, cucumbers, or sunflowers than with a famously difficult perennial that may take six weeks to consider germinating.
Choose one or two things that genuinely interest you.
Keep the first experiment manageable.
Our seed collections for beginners explain how to choose a useful mix without planting more than your space or attention can handle.
If you would rather begin with varieties selected for dependable performance, our Easy-to-Grow Vegetable, Flower, and Herb Garden was built around simple germination, reliable growth, and the kind of early wins that make people want to keep gardening.
Start with something likely to grow.
Then use that confidence to try something more adventurous.
Germination Is the Beginning of the Conversation
A seed does not need you to know everything.
It needs moisture without drowning, air around its roots, a temperature it recognizes, and light once it reaches the surface.
Give it those things and wait.
Some seeds will emerge almost together, turning a bare tray green overnight.
Others will appear one at a time.
A few will do nothing at all.
Experienced gardeners do not get every seed to germinate. We plant too deeply, water too enthusiastically, forget a tray in a cold corner, lose labels, and occasionally stare at an empty pot for two weeks before realizing we never planted anything in it.
Then we plant again.
That is the DH part of seed starting.
The goal is not perfect germination.
The goal is to grow something, notice what happened, and become a little more confident the next time.
Every sprout is useful.
The strong ones become plants.
The strange ones teach you something.
The failures make room for another seed.
And then, one ordinary morning, a curved green stem pushes through the soil where there was nothing yesterday.
You will probably lean closer to look at it.
Everyone does.
That may be the moment a garden really begins.
Happy gardening, The DollarHeirloom Team